Homepage->Blog index
Soul Calibur 1: The reverse engineering rabbit hole (UPDATED)
Date written: 2022/12/28
Date updated: 2023/01/14
Aaaah, Namco. We all know 'em, they make some good-ass video games, and they've been really flexing their might in the fighting game genre during the 5th generation of console gaming, both in gameplay and visuals. While we all know of the legendary Tekken 3 and Soul Edge, in my opinion I believe that they really outdid themselves with Soul Calibur.
"Soul Calibur? That Dreamcast launch game? That's 6th gen!", well yes and no.
True, it was a massively successful Dreamcast launch title revered for it's graphics and gameplay, but it started off as an arcade game running on beefed up PS1 hardware, specifically the "Namco System 12" spec.
While I have spent countless of hours playing the DC version with friends over NullDC back when I was stuck with an AMD Sempron 2800+ PC, it's actually the arcade version I ended up growing a liking to.
I don't have the real arcade PCB, so I can only experience the game over MAME with some tweaks to fix the game speed. Not perfect, but it still retains the quick-to-load arcade experience.
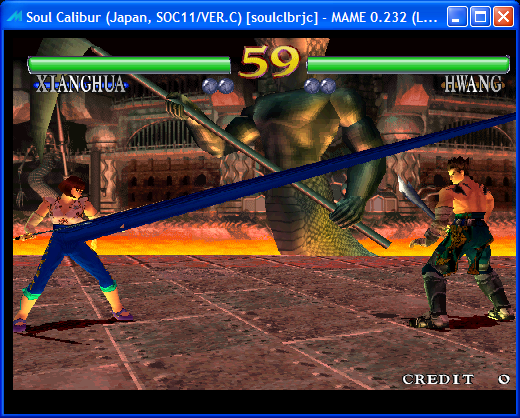
The graphics obviously look more primitive thanks to the weaker hardware, but a thing worth noting is that the character designs and their art styles have pretty much completely changed with the Dreamcast release. Personally, I prefer the character designs of the arcade. The more cartoony aesthetic fits more in my eyes.
It is this fascination with the arcade version's graphics that gave me the idea of trying to extract the character models out....
So imagine my shock when I learned that neither the arcade or Dreamcast versions have any kind of modding scene, and hence zero research into the data of the game.... if only I knew how difficult this was gonna be.
So, first order of business is to gather all the necessary tools.
Luckily for me, MAME already has the most important of them all built in: a flexible debugger. Prepare a hex editor on the side, start MAME with the -debug flag, pick the game, and voila, the debugger pops up! To run the game, all one has to do is pick "Run to next CPU" (since the H8/3002 coprocessor is selected by default for whatever reason), and then "Run".
Now, a naive person would think to dump the banked data ROMs and look for known strings. I say naive because...
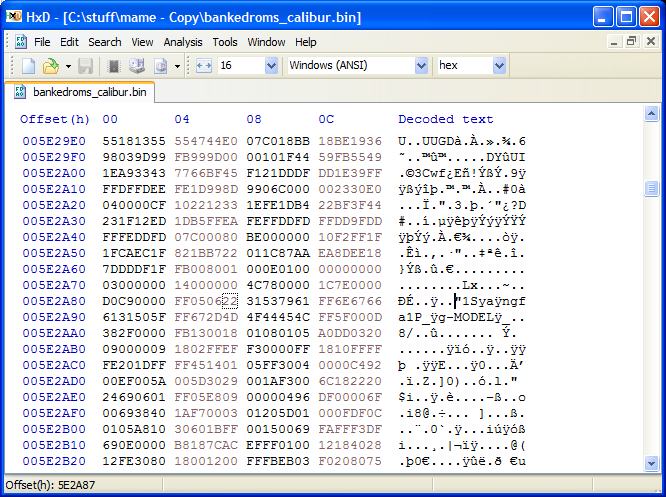
Oops! That looks like compressed data! Specifically, it appears to be some form of LZ compression (and as any old game hacker would know.... there are hundreds of proprietary LZ variants).
We're lucky to find model filenames at least just by searching for the "MODEL" string, that's not something you see every day with games stored on ROMs!
Okay, we could try and crack the compression algorithm, but that's gonna take quite a bit of time. Instead, let's try and find the decompressed data in RAM.
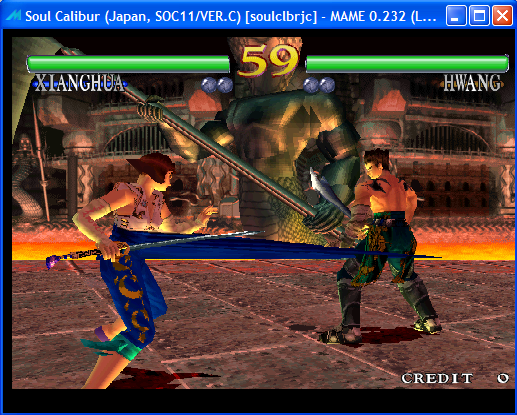
Start a 2-player match (I'll pick Xianghua in her default skin), set the Infinite Time cheat, use the "saver" debugger command to dump the whole RAM region, aaaand...
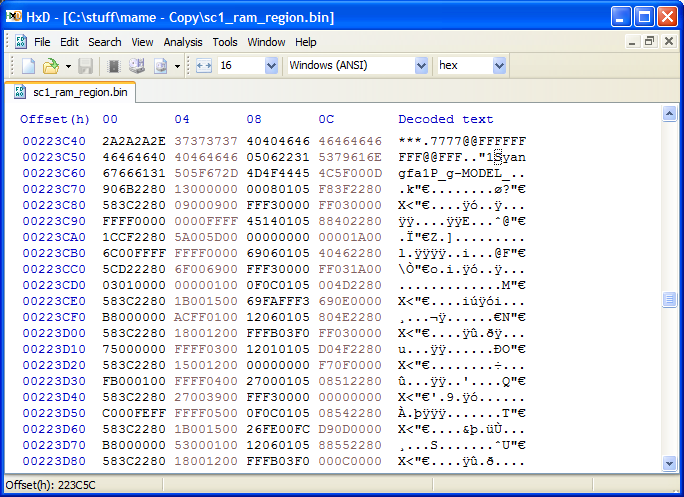
Bingo! Uncompressed model name, and distinct byte patterns! This is the base address of Player 1's character model, "Syangfa" here referring to Xianghua, except spelled in Romaji. Now comes the hard part, which is making sense of all this data.
So, where do we begin? Well, let's first try and find this data in the MAME debugger.
Since we dumped the entire RAM region from beginning to end, the addresses in the hex editor should map 1-to-1 to what we see in the debugger's memory window, with the caveat of having to start from 0x80000000.
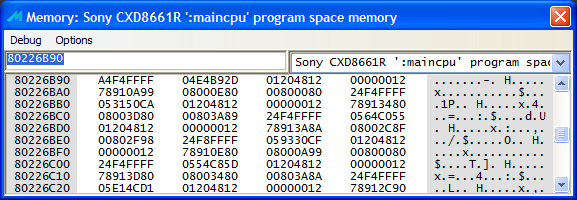
The name we found starts at 223C58, so let's enter 80223C58 into the input form.
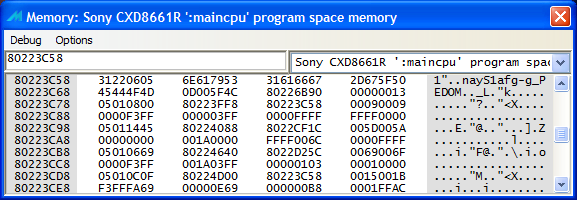
Beautiful! We now have a known starting point. The model name looks messed up, but this is because of the little-endian byte order MAME defaults to, since the MIPS CPU on the PS1 is little-endian and has 4-byte long words.
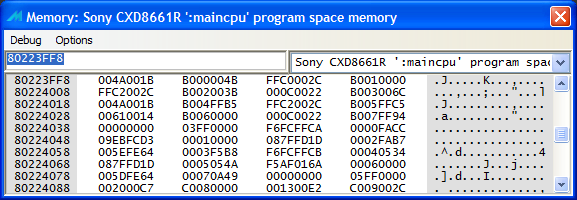
If you need big-endian, simply set the byte groups to be 1-byte chunks. Right now for our needs we should stay with little-endian. Why?
Well, if you look carefully you'll notice that there's quite a few words starting with the byte 80, along with repeating patterns of "00000000 3FFF0000" double words. The former are offsets converted into absolute addresses during the loading process.
These point to various things in the model data. The latter, from my research, appear to be markers that mark the end of lists. The first one we see, 0x80226B90, points to a list of commands that will be the most complicated data set in the model to crack. We'll leave this for later.
The next address, 0x80223FF8, is the first one of interest. Let's jump to it.
Hmm, we can see a pattern of incrementing shorts ending with one of those aforementioned markers. What happens if we garble the first word here? (Don't forget to save a state first!)
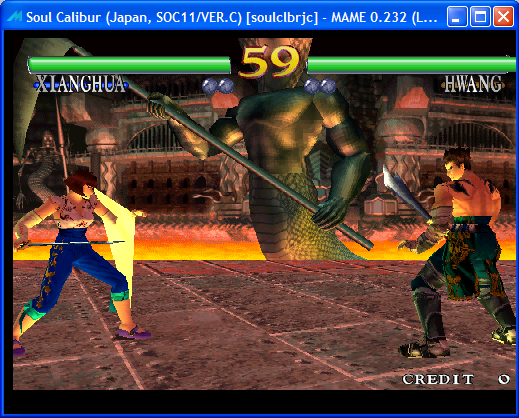
Xian's got a spike bursting out of her waist now, and it gets skewed even more when we modify the second word in the next word! What happens if we modify the first short of the second word though?
Ah, this time we have a spike that is glued to a certain part of the screen!
Alright, simply through observation with our eyes of how the graphics change and how laid out the data is, we can outline exactly what we're seeing here:
	struct VERTEX_LIST{
		short X;
		short Y;
		short Z;
		short index;
	}VERTEX_LIST;
We have three coordinates for each vertex, and an index uniquely identifying them. Modifying the coordinates moves the vertices around as expected, but modifying the index also leads to noticable changes.
Let's get back to the start of our model and move forward. The next address just seems to point to 0x80223C58, and changing it does nothing. Next! 0x80224088, same story as before, only this time for Xianghua's chest.
Okay, what about 0x8022D25C?

Another set of repetitive data, except this time changing it has zero noticable effect on the graphics or gameplay. We'll skip this for now.
After this, we're essentially seeing the same pattern of a vertex list pointer being paired with an address that either points to the table that does nothing or the start of the model. This pattern repeats until we hit a long stream of 00000000s.
Let's turn our attention back to that first address, 0x80226B90. This is where things start to get complicated.
My, oh my , what are we looking at here? Changing the first byte either makes the character invisible or completely breaks the game's renderer!
The rest of the word doesn't seem to do anything, while changing the other words also radically shifts vertices around except...not quite in the same way?
I'll spare you the trouble, what we're essentially looking at here is Namco's take on Sony's TMD/PMD model format.
They look like GP0 GPU commands, have the length of a 24h command... but instead of using two vertex coordinates, they use three vertex indices, and there's also a depth priority byte and... ugh, I'll just put the struct pseudo-code now:
	struct POLY_COMMAND{
		char GP0_ID;			//GP0 command ID (almost always 24h, or something functionally identical like A4h)
		char depth_priority;
		short padding;
		byte+nibble Vertex1;
		byte+nibble Vertex2;
		char Vertex3;
		u_long unknown_lighting;	//Tons of weird parameters that affect lighting
		u_long unknown10;		//Doesn't seem to do anything
		short CLUT1;
		char Texcoord1X;
		char Texcoord1Y;
		short Texpage;
		char Texcoord2X;
		char Texcoord2Y;
		short padding2;
		char Texcoord3X;
		char Texcoord3Y;
	}POLY_COMMAND;
As you can see, it's quite a beast that even I don't fully understand yet, but these are crucial for connecting the vertices into polygons and mapping textures to them!
Alright, for starters, let's try and visualize the vertices so we know what we're working with.
Fortunately there exists a program specifically designed for 3D model reverse engineering: 3D Model Researcher!
Let's load the RAM dump from the match we just had earlier and configure the program to read one of the submeshes. We don't wanna (and currently can't) load everything at once, since other garbage data will get in the way.
Let's go with the submesh at 224640, the head.
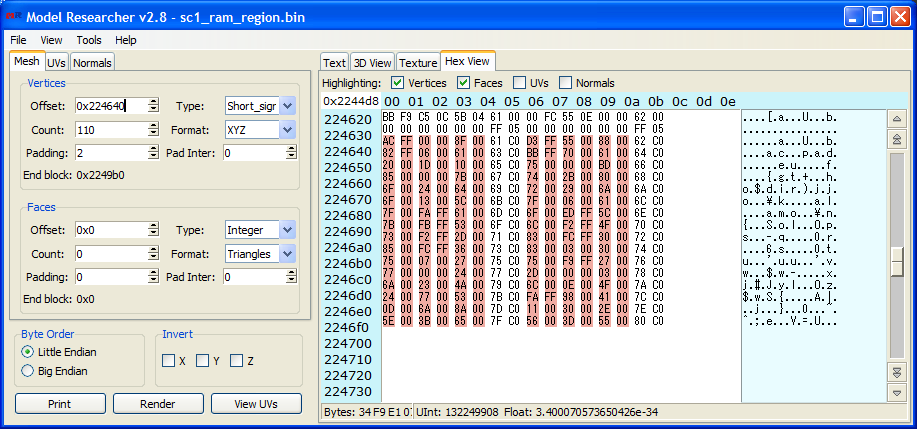
We want to set the type to be "short_signed", since that's what the PS1 supports. There should be no more than 110 vertices, and we'll set the padding to 2 so as to ignore the vertex indices. Let's also set the rendering orientation to XZY and hit Render!
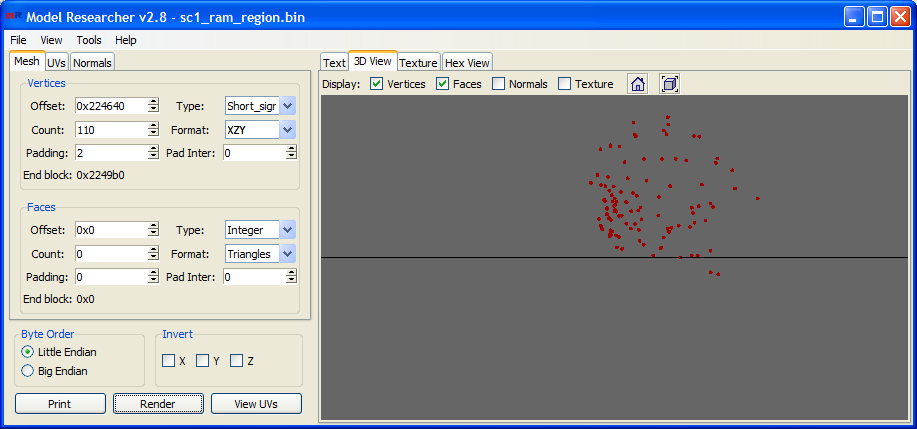
Yep, that's Xianghua's head alright!
Okay, let's do the rest of the model now! First we'll need to filter out all of the unnecessary junk data that will get in the way of Model Researcher's visualizer. Fortunately, I've already written a program that does exactly that with a RAM dump (You might wanna modify it though).
(Sidenote, the linked repo also comes with documentation on what's currently known of the model format)
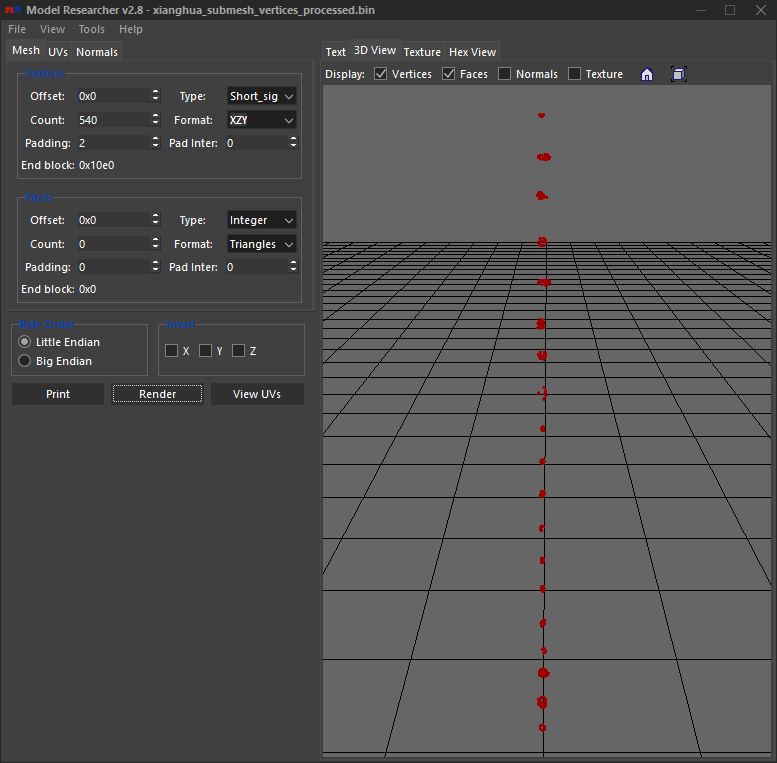
Try this again with a cleaned up file aaaand...

What? No T-pose? Indeed, game models were commonly stored like this in memory as a form of optimization. We can split the body parts manually though.
Yep, that makes more sense, but it still needs more steps to be fully assembled together.
Unfortunately, that is where this blog entry comes to an end. The next step requires deciphering the command list at 0x80226B90, which essentially requires entirely reimplementing the game's character rendering routines....way out of my league of skill and knowledge,
and this is without even scratching the surface of the skeletal animation system, which we also need research on to be able to pose the model into something that looks human.
Since this is going to be a highly complicated endeavor, I'm politely asking you, the reader, to consider helping out, especially if you're skilled with 3D (or specifically PSX) game data reverse engineering. If you can help, please contact me through the LainNet BBS or on Discord.
Well, this was quite the productive January, I must say. At a certain point it became obvious that dynamic analysis alone wasn't gonna cut it, and that disassemblies and decompilations would greatly benefit my research efforts.
This is where I want to show my gratitude to spicyjpeg, who has aided me greatly in setting up Ghidra's automatic analysis tools to properly disassemble the game's program ROM,
and mariokart64n, who has made sense of all my previously provided documentation and everything that I'll describe later in this blog entry, and used that knowledge to create this MaxScript
that successfully converts a decompressed model from ROM into a properly sorted mesh that contains bones, weights, UVs, and an A-pose. Oh yeah, there's also been progress regarding decompression. Let's start with that first.
With some further digging, I managed to locate the decompression routine, disassemble and decompile it in IDA 7.5, and then transfer the decompiled function into a standalone C program. It successfully decompresses any files ripped from ROM. You can get the code and Win32 binary here.
For anybody wondering, the reason I named it "nlz1" is because in the Dreamcast and Android ports of the game, the decompression function is called F_DecodeNlz2, so I figured retroactively naming the older implementation Nlz1 made more sense.
So that POLY_COMMAND struct I defined above? Not entirely correct, specifically the vertex data. What's actually happening is that, in the case of character models, three 10-bit indices are stored within the second 32-bit word that are decoded with a certain formula (which you can read in the MaxScript), while weapons store four 8-bit indices (their poly commands are also one word shorter).
GP0_ID is also largely responsible for telling the GPU if it's supposed to render a 3-point triangle or a 4-point pair of triangles. Now, these indices are meant to act as offsets for a screenspace transformation buffer, fed to the GPU after the game finishes transformation of all objects and applying perspective transformation to a 2D coordinate system (Remember, the PS1 GPU does not understand depth!).
Luckily, since the transformation buffer's data structure largely maps 1-to-1 to that of vertex lists, face data can in fact be restored in 3D. After a few days of semi-successful experiments and yet more RE with mariokart64n, we achieved this:
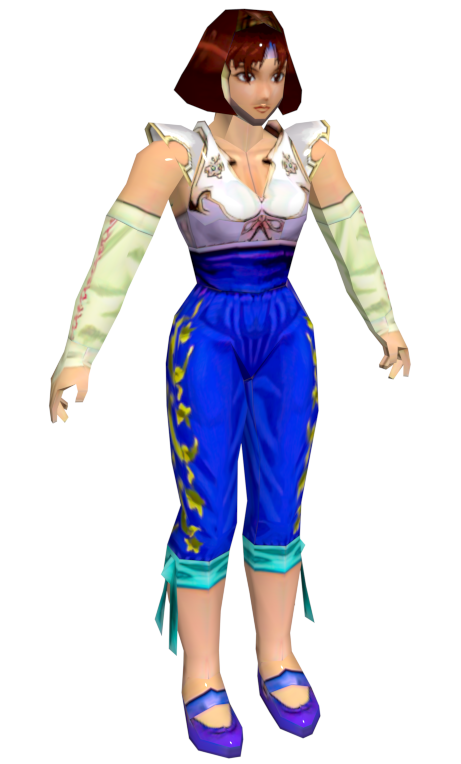
Pretty much perfect, isn't it? Maybe some polishing up aaaand..
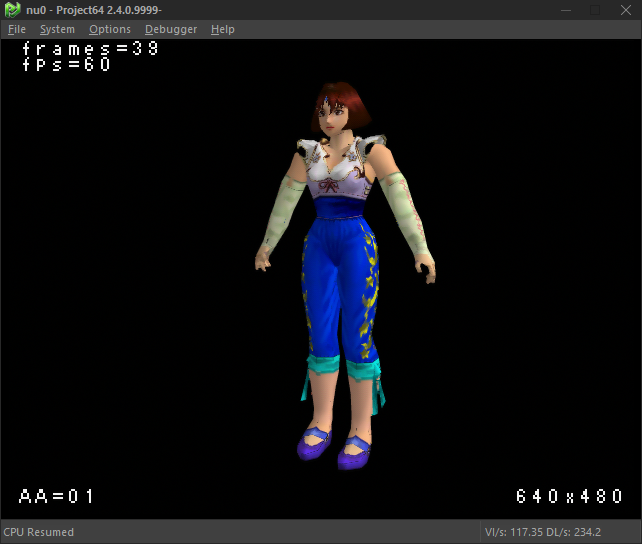
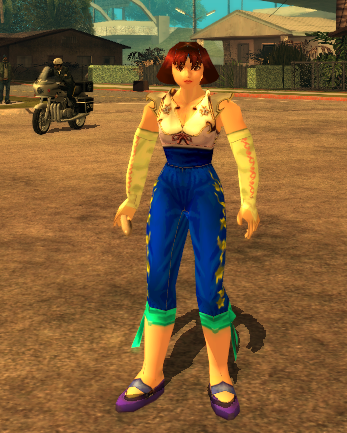
Would you look at that, it works as a native N64 display list just fine (didn't even need to correct the textures), and even porting it to an entirely different game like San Andreas proved relatively trivial. Oh yeah, speaking of textures...
It's not clear what the exact format is. Some textures in the ROM are identified as TIM, and after character and weapon models there is data that starts with a "TIM.FYE" string, but psxprev didn't identify the latter properly.
As I was growing impatient, I decided to take the brute force approach of simply ripping textures with a virtual machine and NinjaRipper 2, which automatically atlased all the textures where they should be and resolved the color look-up tables.
The weighted influence system turned out rather simple. Any submeshes attached to just one bone are 100% influenced by it, but any vertices shared between two submeshes are 50/50 influenced by their respective bones.
This marks the end of this journey. I guess stages remain to be reversed, but I don't have much interest in them currently.